Web Scraping for Data Scientists


Enough of readymade CSV files; Do Data Science the real-life way.

As described by Wikipedia, "Web scraping, web harvesting, or web data extraction is a form of copying, in which specific data is gathered and copied from the web, typically into a central local database or spreadsheet, for later retrieval or analysis."
TL;DR; Here is the GitHub link to the code: github.com/SteveKola/articles_based_project..
Most times in our Data Science workflow, we won't have a CSV file, tied with ribbons, waiting for us to explore. We'd have to query our data from databases, consume data from API, etc. Another means of getting data is by web scraping, which is perceived by non-programmers as a dark art, as it is the ability of a program to set off on its own to explore the Internet and collect data. It might sound alien-ish if you are new to it, but it is one of the most logical and easily accessible sources of data.
As a data scientist, the first step in most projects is securing an appropriate and relevant dataset. In that regard, web scraping is an essential tool to have in your inventory, as it gives you almost unlimited access to the treasure troves of information available on the internet. "Data is the new oil", as the common saying goes, and the Web is like Saudi Arabia with an abundance of oil.
Do keep it in mind that some websites don't want anyone scraping their sites and when a website format is altered, you might have to update your web scraper.
In this tutorial, we'll be going through the basic building blocks of web scraping by scraping the 2020's Artificial Intelligence Bootcamp attendees list on Data Science Nigeria's website,
datasciencenigeria.org/2020-bootcamp-attend.., and saving it in a CSV file.
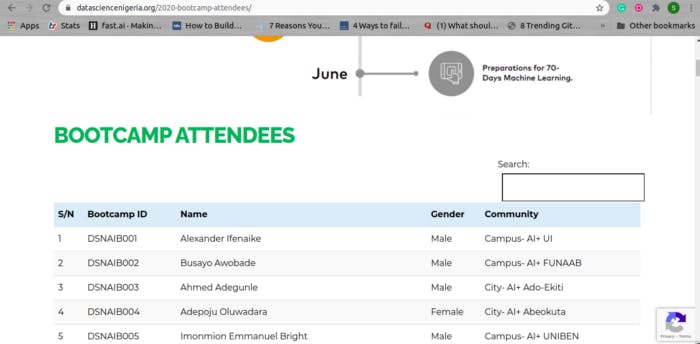
What we can see here is that each row (attendee) on the table has an S/N, Bootcamp ID, a name, Gender, and the AI Community he/she belongs to. Our goal is to retrieve this information for each participant.
We'll be using the Python Requests library for this task. Requests is widely known as HTTP for humans, and it makes it quite stress-free to retrieve websites. If you want an overview of using Requests, feel free to check out the quick guide start at requests.readthedocs.io/en/master/user/quic...
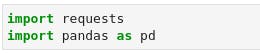
So the first step is to prepare our Jupyter notebook by importing the needed libraries (we'll probably import others later on) as we did in this following code snippet;
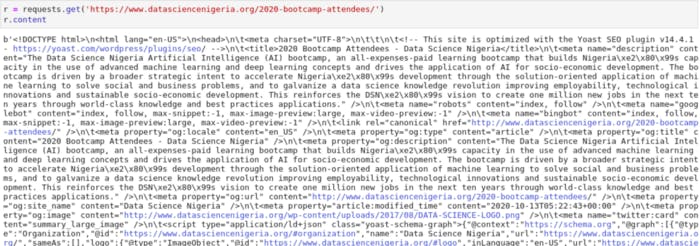
The URL for the data is datasciencenigeria.org/2020-bootcamp-attend... Let's run a quick test and make sure that we can retrieve the web page.

This code makes a call to the site, retrieves the information, and stores it in the r object. There are lots of attributes we could retrieve from the r object, but we only want the content for now. We can see the output in the screenshot below;
The next step is to examine the page elements so as to see how we can parse the page data;
Open the DSN webpage in Chrome and right-click anywhere on the page.
You should see Inspect. Click on it. The page should now look like this;
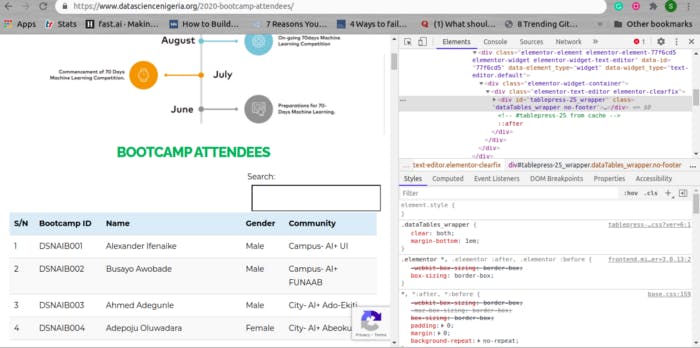
In the tool that we've just opened, there is a square with an arrow in the upper left-hand corner. Click that, and then click on the S/N named 1 on the page. It should look like the following;
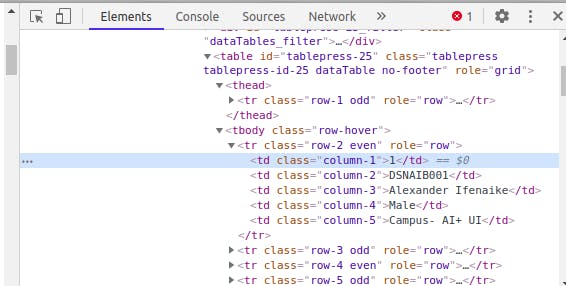
We can see from this that the row's data is in a table (We have a table, thead, tbody, and tr tags above our present tag) and that the first td contains the S/N, the second contains the attendee's Bootcamp ID, the third contains the attendee's name, the fourth contains the attendee's gender, and the fifth contains the AI Community the attendee belongs to.
Let's now begin to build the code to test our parsing of the data. We will use a library called BeautifulSoup for the HTML parsing. BeautifulSoup is a popular, easy-to-use Python HTML parsing library. It can be pip installed if you don't have it already. It comes pre-installed with Anaconda though, so you shouldn't bother if you are in your Conda environment. Its documentation is available at crummy.com/software/BeautifulSoup/bs4/doc.
To get started, we simply need to pass our page content into the BeautifulSoup class as done below;

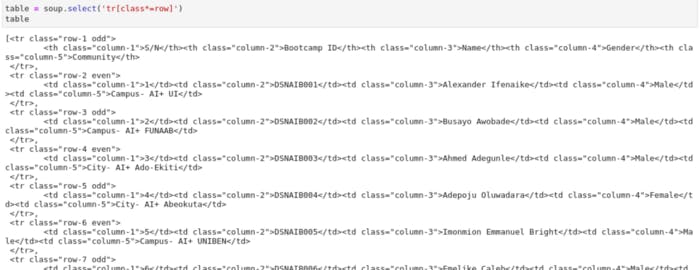
Now we can use this soup object that we've created to begin parsing out the table. Let's try to retrieve the tr tag that contains our attendees' data on the webpage.

What we've done in the preceding code is to select all tr'es that contain row as part of their names. These are tr'es that contains the data we want.
Next, let's look at the output from this preceding code below;
Notice that we have a Python list of all the tr tags we want. Let's confirm by checking the length of the list;

This totally makes sense considering that we have 479 Bootcamp attendees + a header row.
Pulling out the Individual Data Points
Now that we have all the tr'es with our attendees' data, we need to pull out the individual data points for each attendee.
These are the points in each that we want to target;
- S/N of the attendee.
- Bootcamp ID of the attendee.
- Name of the attendee.
- Gender of the attendee.
- The AI Community of the attendee.
Let's begin by looking at the first row:

The preceding code gives us this output:

Notice that this first row contains the header. We should probably start looking from the 2nd row for our data.

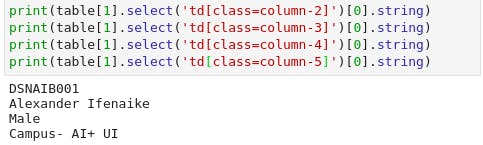
Yay! The 2nd row contains all of the data points we want. The next step is to begin our parse to target them individually.
Let's parse out our S/N column first. We can do that with another select statement, as shown below:

This exactly what we are hoping for. We can now continue to retrieve the other data points of the attendee.
We now have all the data that we were seeking. Let's now pull it all together in a loop so that we can pull the data from each row and save it into a list.
In the following code, we will pull out all the data points for each row;
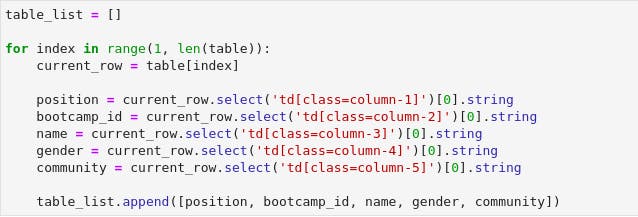
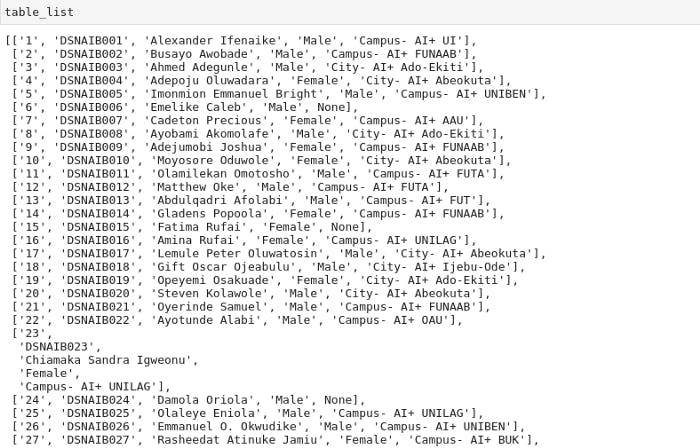
Let's unpack what we did in the preceding code. We know that we have 480 rows that contain the Bootcamp attendees on the page, so we create a for loop that goes through each of them and pulls out the data, and adds all of them to table_list.
We'll verify that with the following print statement: table_list. This results in the output below:
And that's all to scraping! Congrats on getting this far.
Arranging our Data for Future Analysis
Now that we have our data, the next step is to move it into a pandas DataFrame so we can work with it more easily. We will also save it in a CSV file, for future use.

Let's check our data by calling bootcamp_participants.head()
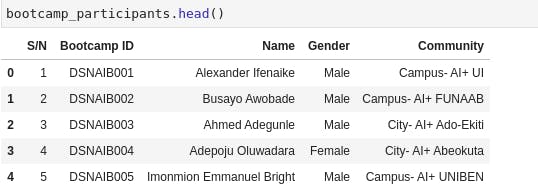
Viola! Now our data looks a lot like we've called pd.read_csv() on those readymade CSV files from Kaggle and Zindi.
The final step is to save in a CSV file for future analysis.

With this, we've got our first introduction to web scraping. And I hope we'd go on to pull down more data from more websites as much as we want.
Thank you for getting this far! If you encounter any issue in your web scraping journey, don't hesitate to reach out to me on Twitter and LinkedIn. Do share this with anyone that might need a soft introduction to web scraping.
Happy Scraping!